
How to make a Flight Case
At some time in your career as an Artist, Musician or Photographer, etc you are going to need to protect your equipment from the rigors of the road, hence the need for a flight case. These come in all shapes and sizes depending on their use. They can be quite expensive and it seems that there is a growing trend to build your own.
You should be able to build your own for half the cost of a professionally made one. This is a good saving and if you take your time and follow the steps below, not only will you get an insight firsthand as to what is involved in making a flight case but you should also be able to make a case as good as the professionals. You will be using the same hardware that they do and the only difference is that they make them every day, and as we all know practice makes perfect.
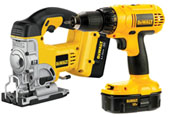
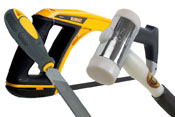
The first thing you need to do is collect all your tools together. You are going to need a drill with a 4mm sharp bit, a jigsaw, and a nylon hammer as well as a normal hammer. The nylon hammer comes in handy when you’re lightly tapping the extrusions and corners into place without causing any damage.
How to Make a Flight case
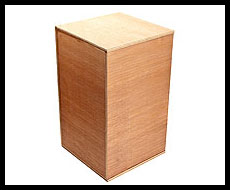
The first thing that you need to do is construct a closed box out of 9mm laminated plywood or far eastern ply making sure that all the panels have been cut square. Use a decent wood glue on all the joining surfaces and nail it all together using 20mm nails and leave to set.
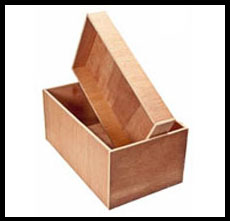
Once everything has set, you then need to cut the lid off. This can be done using a hand saw or if you have the luxury of a table saw this would make the job much easier. Don’t forget...measure twice, cut once. Once you have done this, mark the two parts with a pencil on the inside so that they will fit back together correctly.
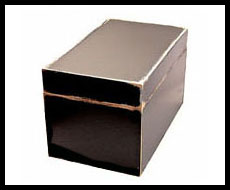
If you're not using a laminated board, paint the box using a tough and hard wearing paint. Some people use exterior black polyurethane paint. I have got good results using black vinyl silk.
For best results: sand the wood lightly and put on the first coat of paint. Once it has dried, sand very lightly again and put on a second coat.
Now comes the tricky bit, but if you take your time and measure twice before cutting you will be ok. You will have to cut the HYBRID EXTRUSION at 45-degree angles preferably using a miter block.
Once you have one piece of extrusion cut to the right length place it on the base and cut another one exactly the same for the lid. Continue like this until all eight extrusions are finished.

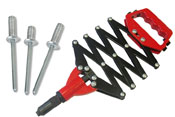
Now it’s time to join the base and the lid together starting with fitting some HINGES at the back of the case. With the case firmly closed place the hinges over the join and rivet the hinges in place. When drilling into the hybrid extrusion do not drill all the way through and use a shorter rivet. A 10mm rivet seems to work nicely.
With the hinges fitted turn the case around and fit a couple of CATCHES on the front of the case. Place the lower part of the catch against the extrusion and once it is level with the extrusion, rivet into place then rivet the top part of the catch and then lock the catch. This will keep the case together while you fit the other. If you are planning to fit a handle on the front of the case, briefcase style then makes sure to leave enough space between the catches to fit it properly.
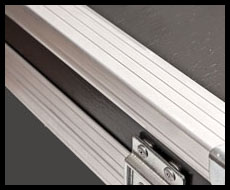
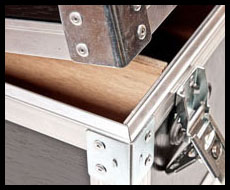
Now it’s time to fit the EDGING EXTRUSION using pop rivets approximately every 4-6 inches. In this case, 30mm x 30mm extrusion has been used. You don't have to cut them full length and miter them, just make sure that the extrusion runs underneath the ball corners that you intend to fit.
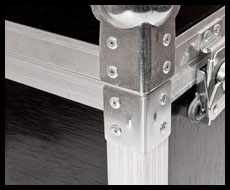
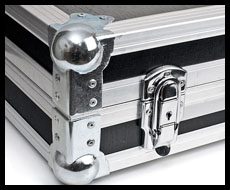
With all the extrusions fitted you will then need to fit CORNER BRACES over the ends of the hybrid extrusion. This will stiffen everything up as well as making the case look more professional. You will probably have to file the edges underneath the braces a bit to get that perfect fit and its best to keep the case firmly closed while you fit the braces.

Next thing to do is to fit the CORNERS. As you can see a corner with an integral brace has been used so this not only tidies up the hybrid extrusion but also finishes off the corner all at the same time. This is where the nylon hammer could come into use as the corner is gently tapped into position. In most cases it will just slot into place.
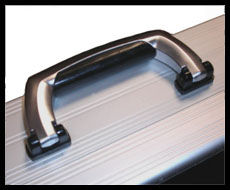
Depending on what kind of case you are building you will have to decide as to what kind of HANDLE to fit on your case. If you use a strap type handle then it is best fitted using a nut and bolt. Do not just screw it on. It will come off. If you decide to go for a recessed flip handle then you can safely rivet them without the fear of them being pulled off. Obviously, you will need to use your jigsaw to cut a hole out and if you’re feeling really confident and own a router you can even recess the whole plate by 2mm.
Now it is time to finish the case off on the inside. This is usually carried out using 10mm or 13mm foam, depending on what you a putting in the case. Do not nip down to the local upholsterer and purchase some furniture foam. Not only does it come in the wrong colour, it’s just not right for the job. Get the proper stuff. There is the harder foam that’s used to keep things in place as well as being used on the sides of trunks. Then there is the slightly softer foam that is used for keyboard cases and cases containing more delicate equipment. I recently made a case for a moving head and using the harder foam, had to make 100mm blocks using five pieces of 20mm foam. Using a craft knife you just cut out the shape you want and repeat it another four times. Spray some glue on the foam and stick them all together until you have the block you require.
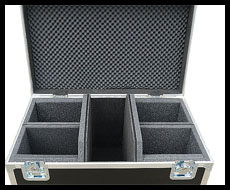
If you are just putting a lining in the case then start off by measuring the internal dimensions and cut a piece of 10 or 13mm FOAM to fit. Using a spray adhesive, first, spray the bottom of the case and then one side of the foam. Leave for a few seconds then place the foam on the bottom of the case. Repeat this on the side panels until every panel is covered. The lid can be lined using the same foam or if you are fitting an item in the case that needs to be held in place eggbox foam can be used.
Now there you have it. You can apply all of this to any size of the case and if you just take your time you will end up with a professional looking case that should give you many years of use.
